This section is useful for beginners to get a basic understanding of The Great Harvest.
The following images should help understand the general rules better. They are meant to simulate a game and what players could generally do. So, let’s begin with the general layout of the play area:

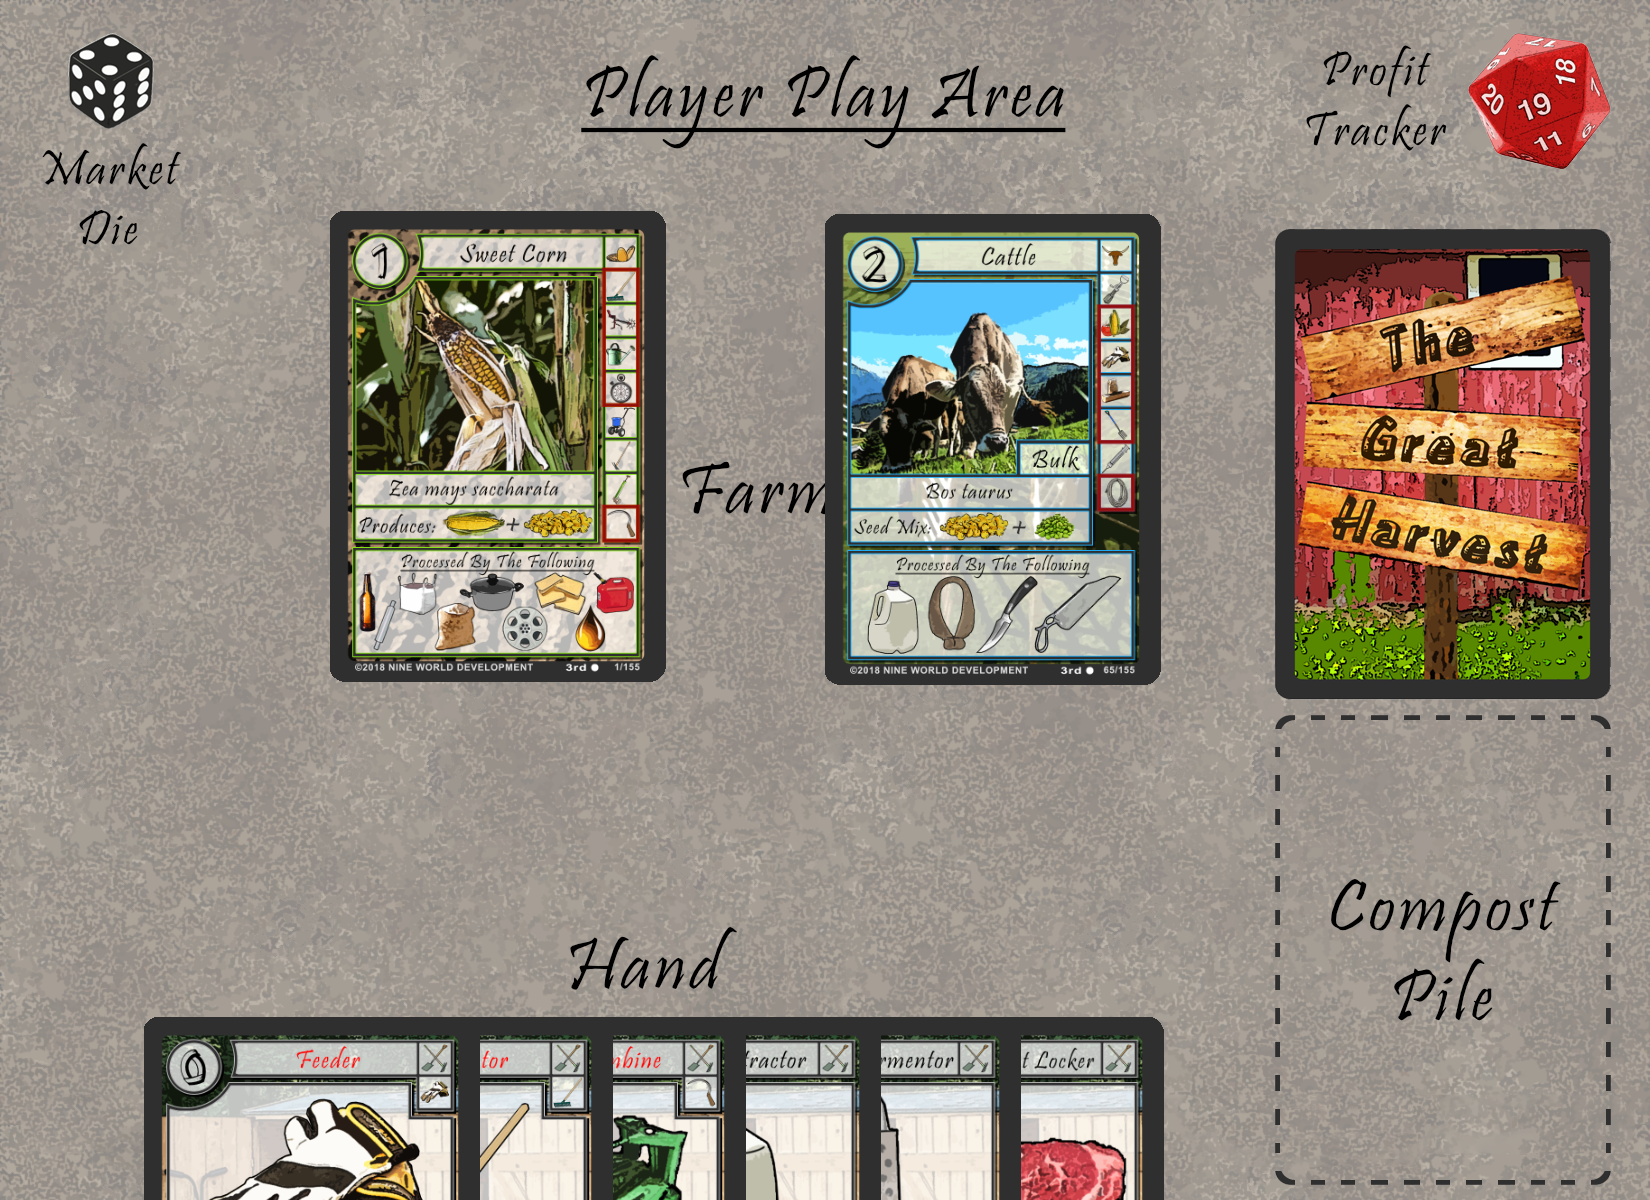
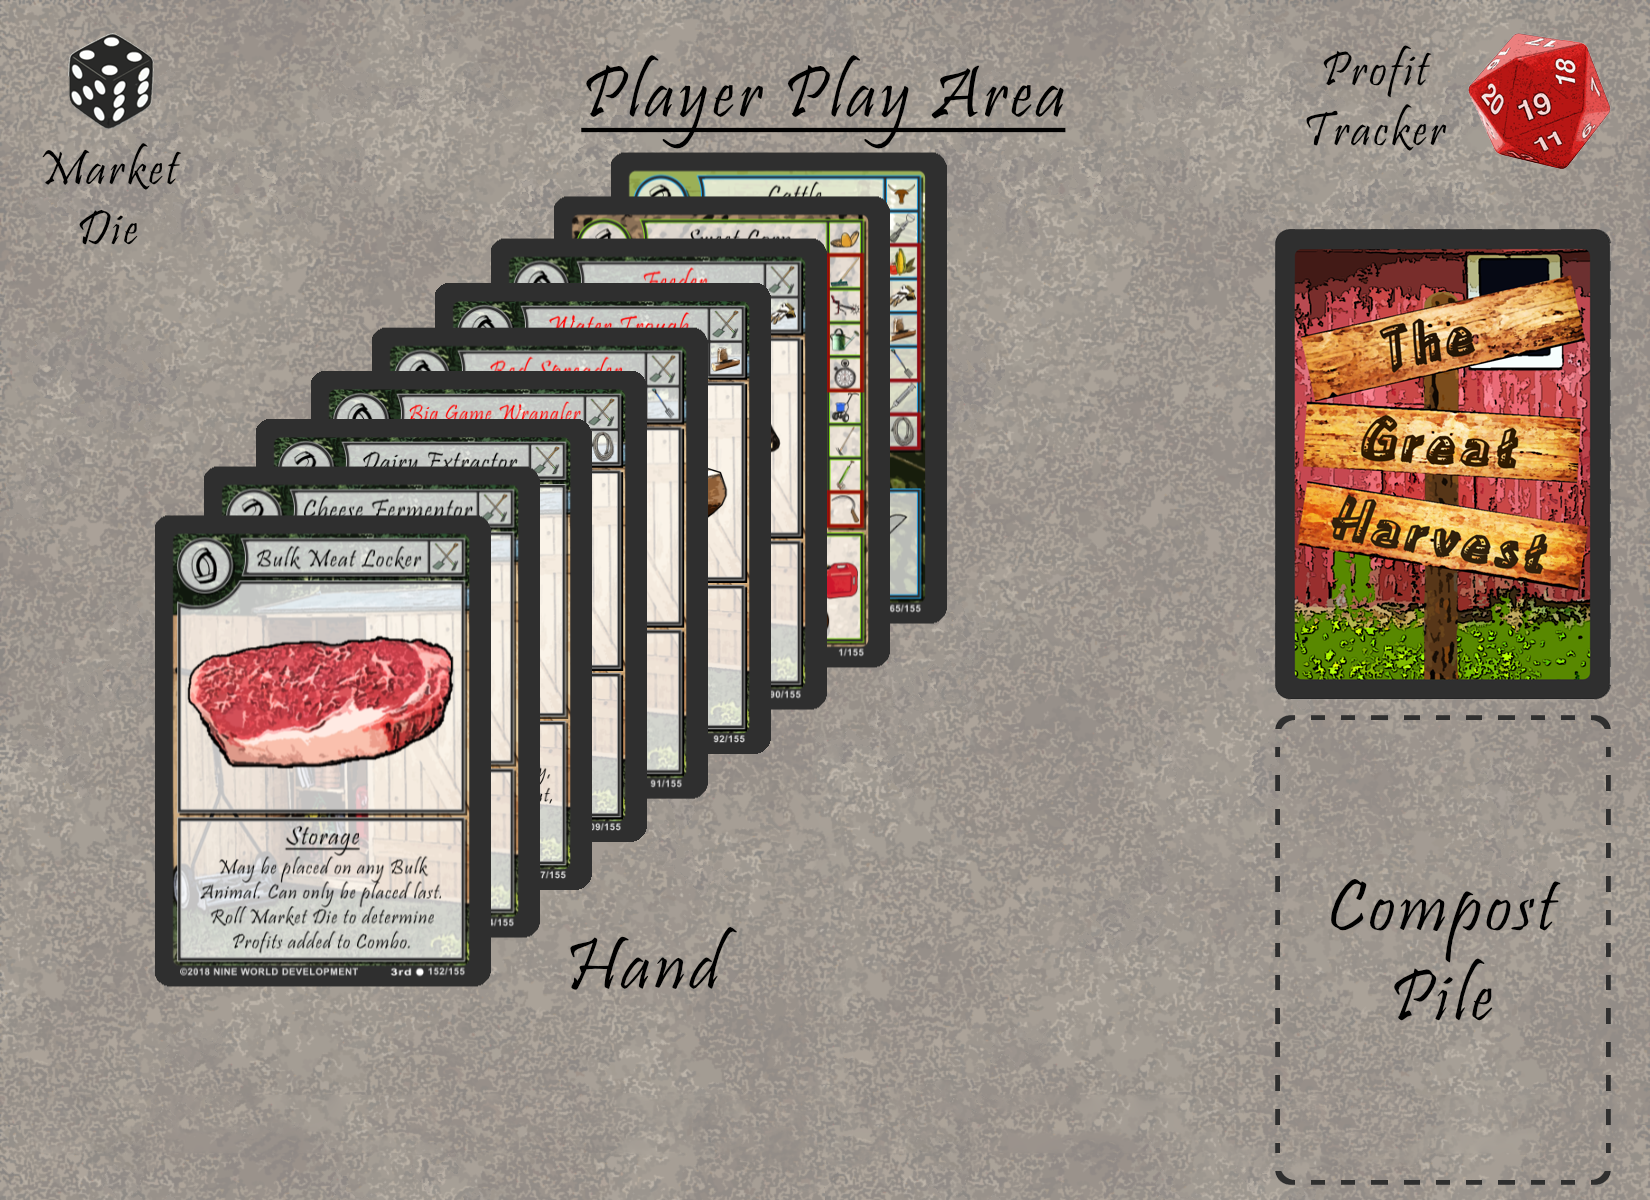
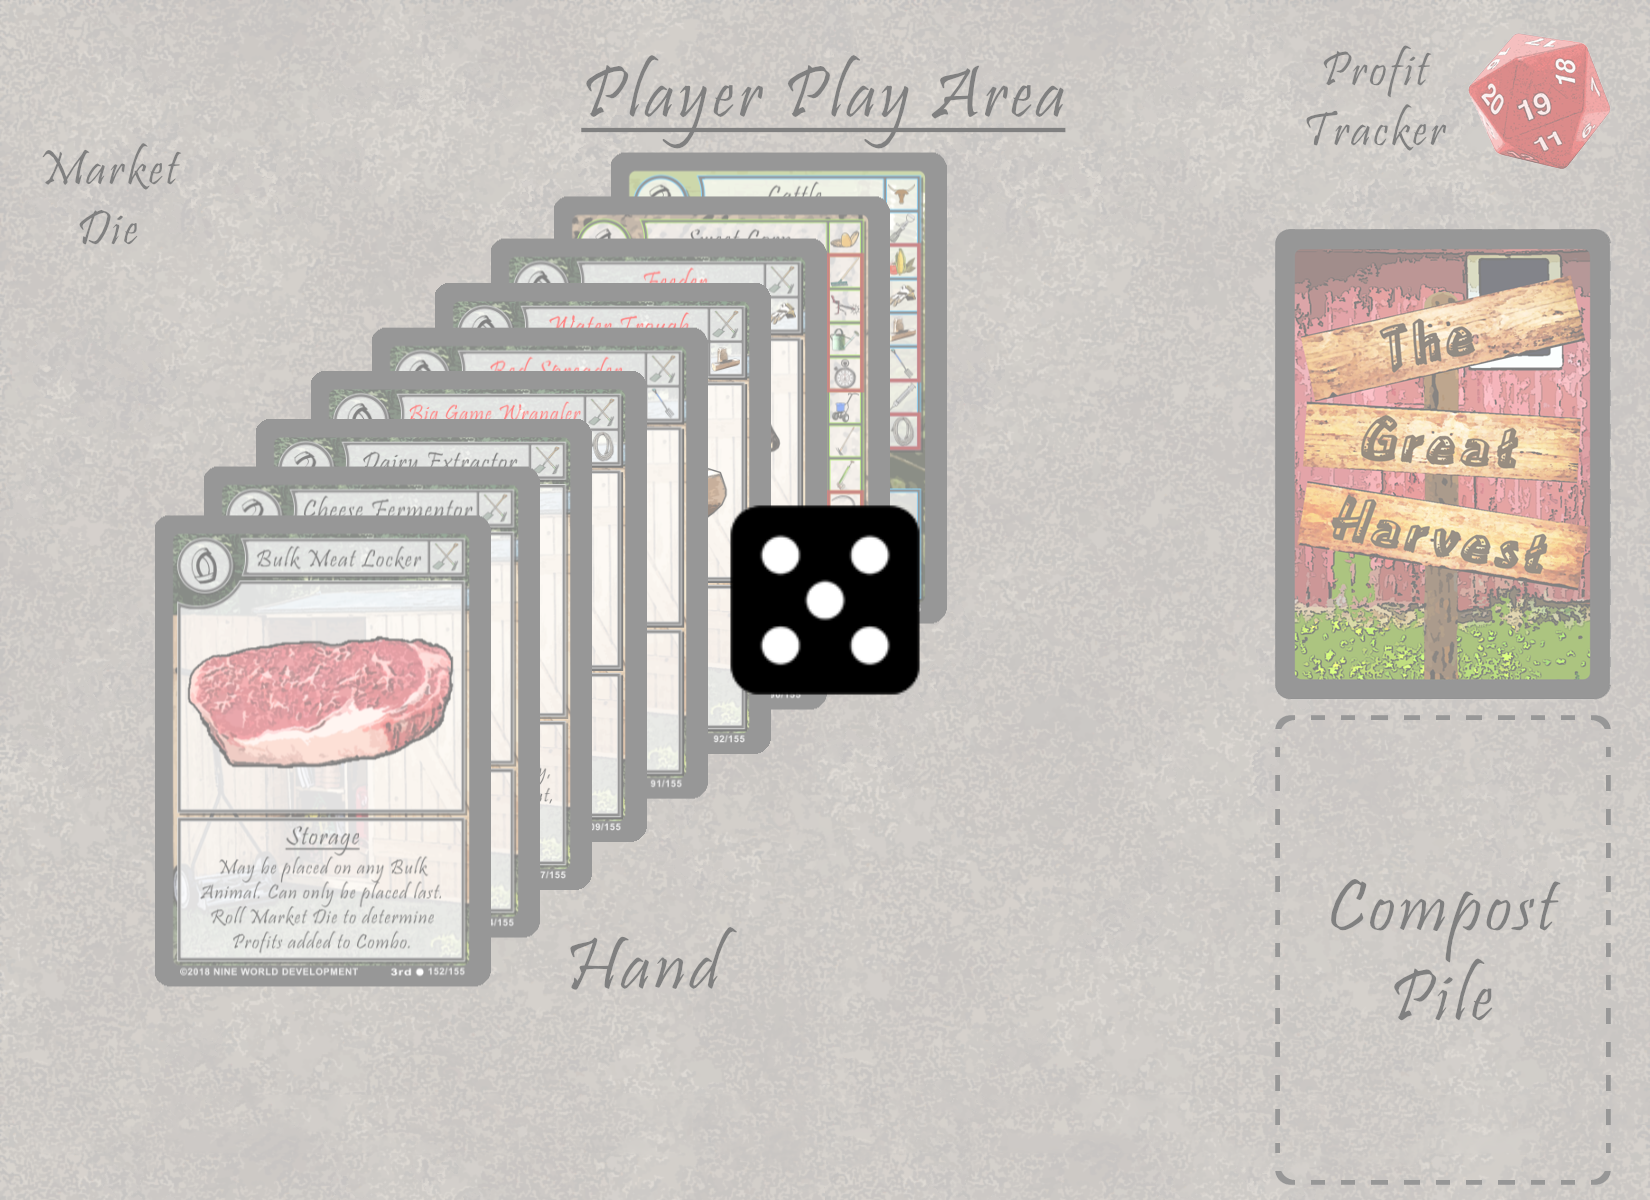
Let’s begin with the dice. The Market Die should be in a shared area for all players, but of course each player can also have their own. The Profit Tracker can be a number of things, but ideally players could use a 20-sided die. The area where cards are played is known as The Farm. To the right of that are the Farm Supplies where the deck goes. Below that is the Compost Pile where the discards go. Finally, there is the player’s hand that is of course only known to that player. Let’s begin a game!

The first thing to do is to shuffle your deck and place it as your Farm Supplies.
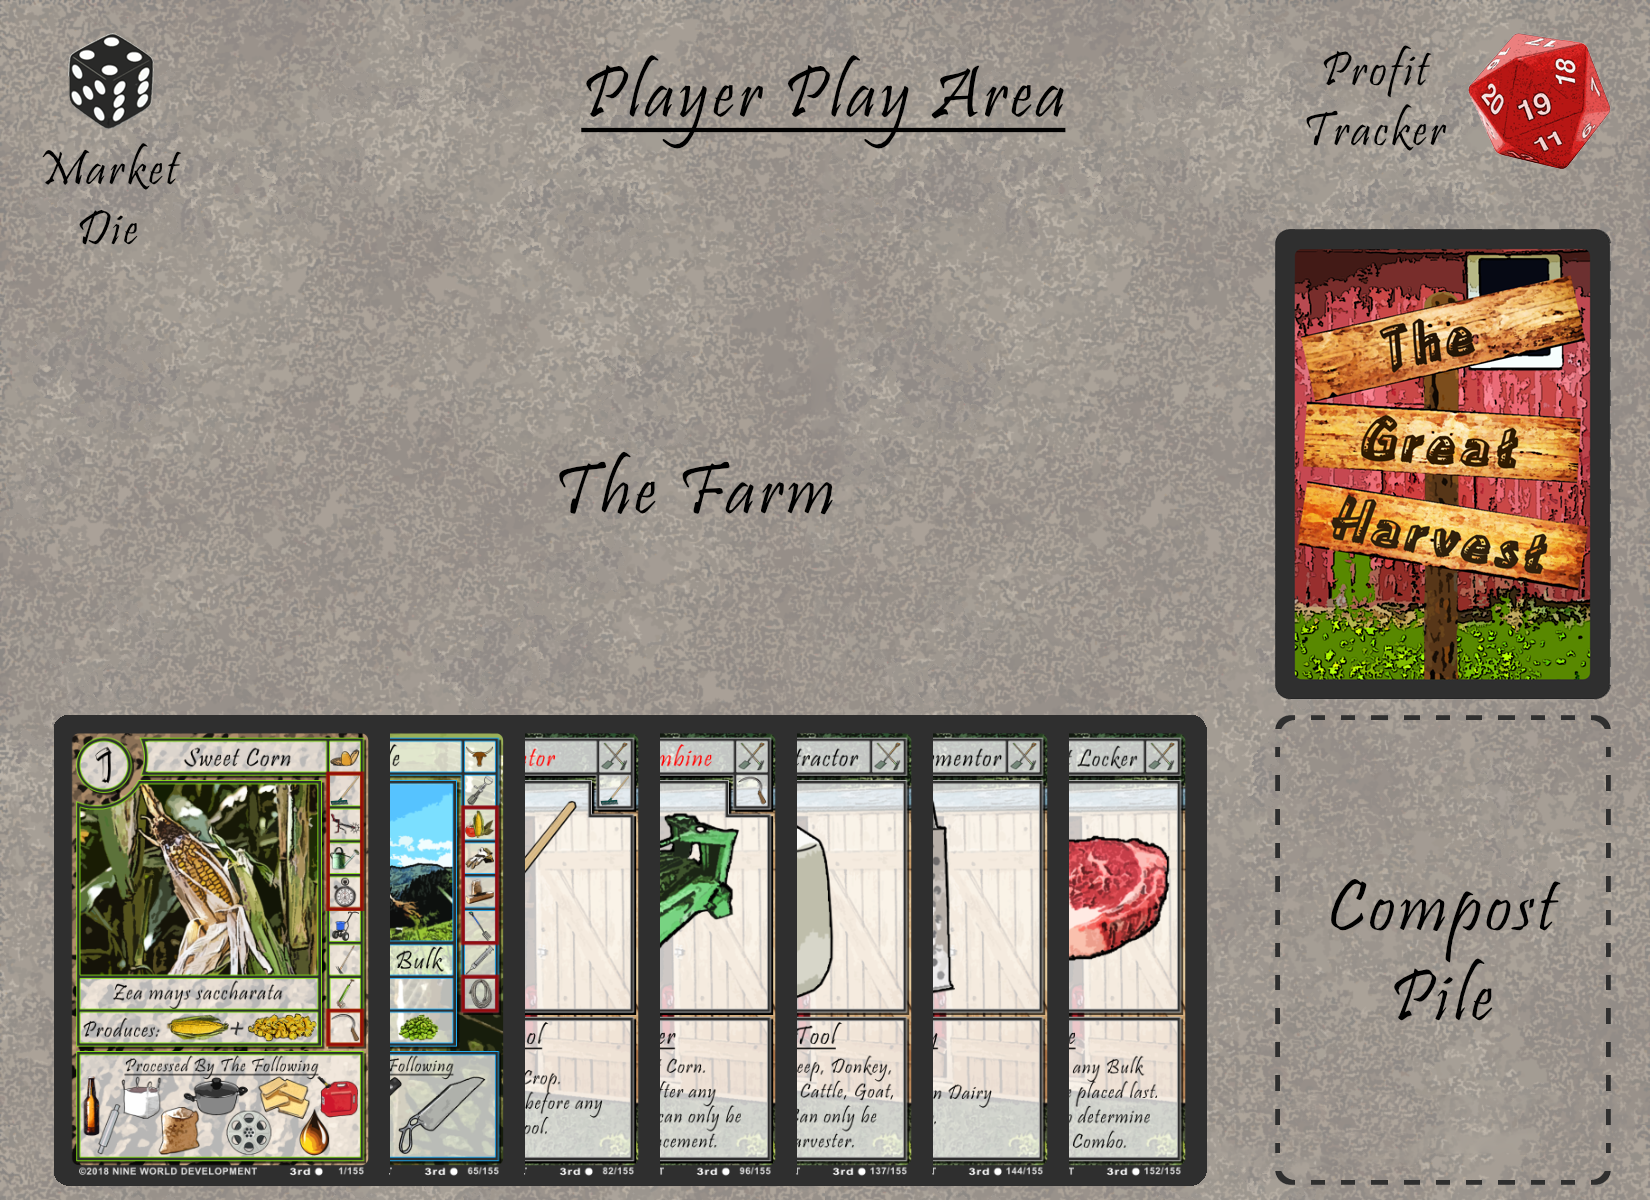
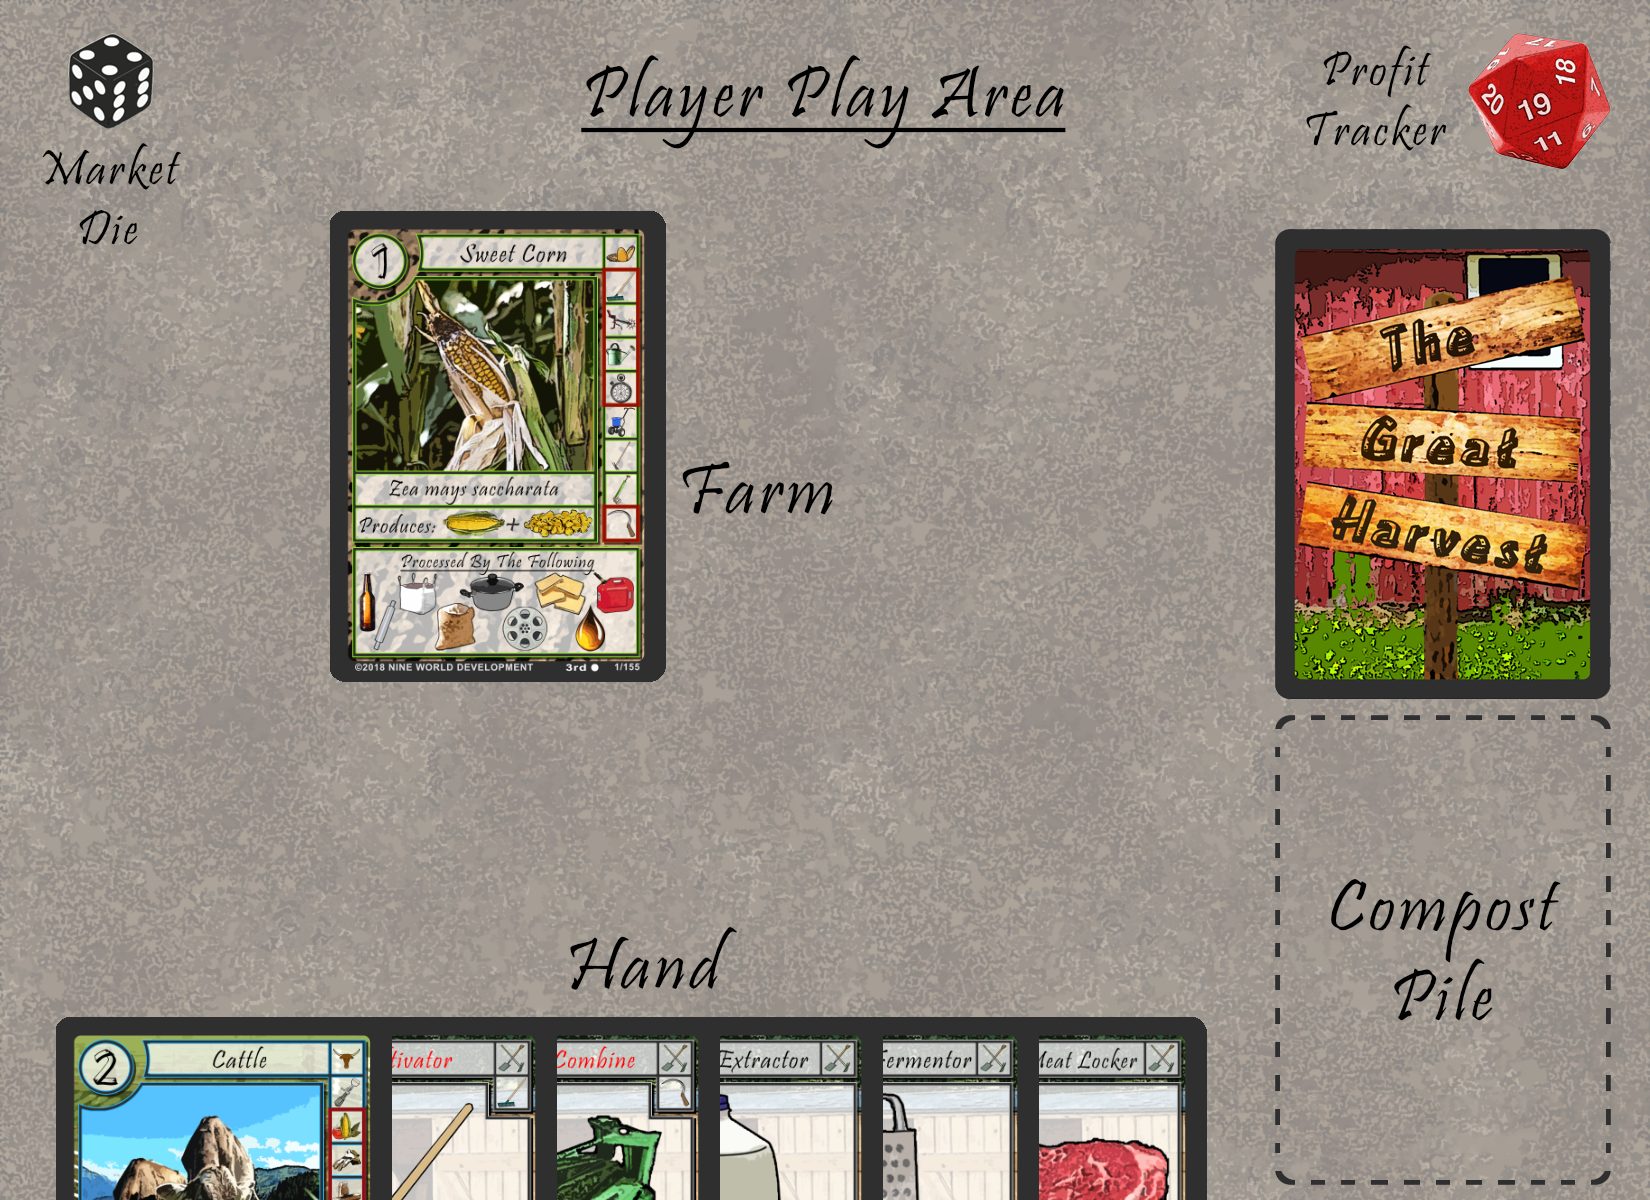
Draw a hand of seven cards from the Farm Supplies. This particular hand has a number of useful cards, starting with the Sweet Corn.

The next card is Cattle.

There are also a number of Tools in this starting hand. One of each class currently available in fact. The first is a Basic Tool.

There is also a Harvester.

Next is an Advanced Tool.
Then there is a Facility.
Finally, there is a Storage Tool. A well-rounded hand to be sure, so it is time to begin.
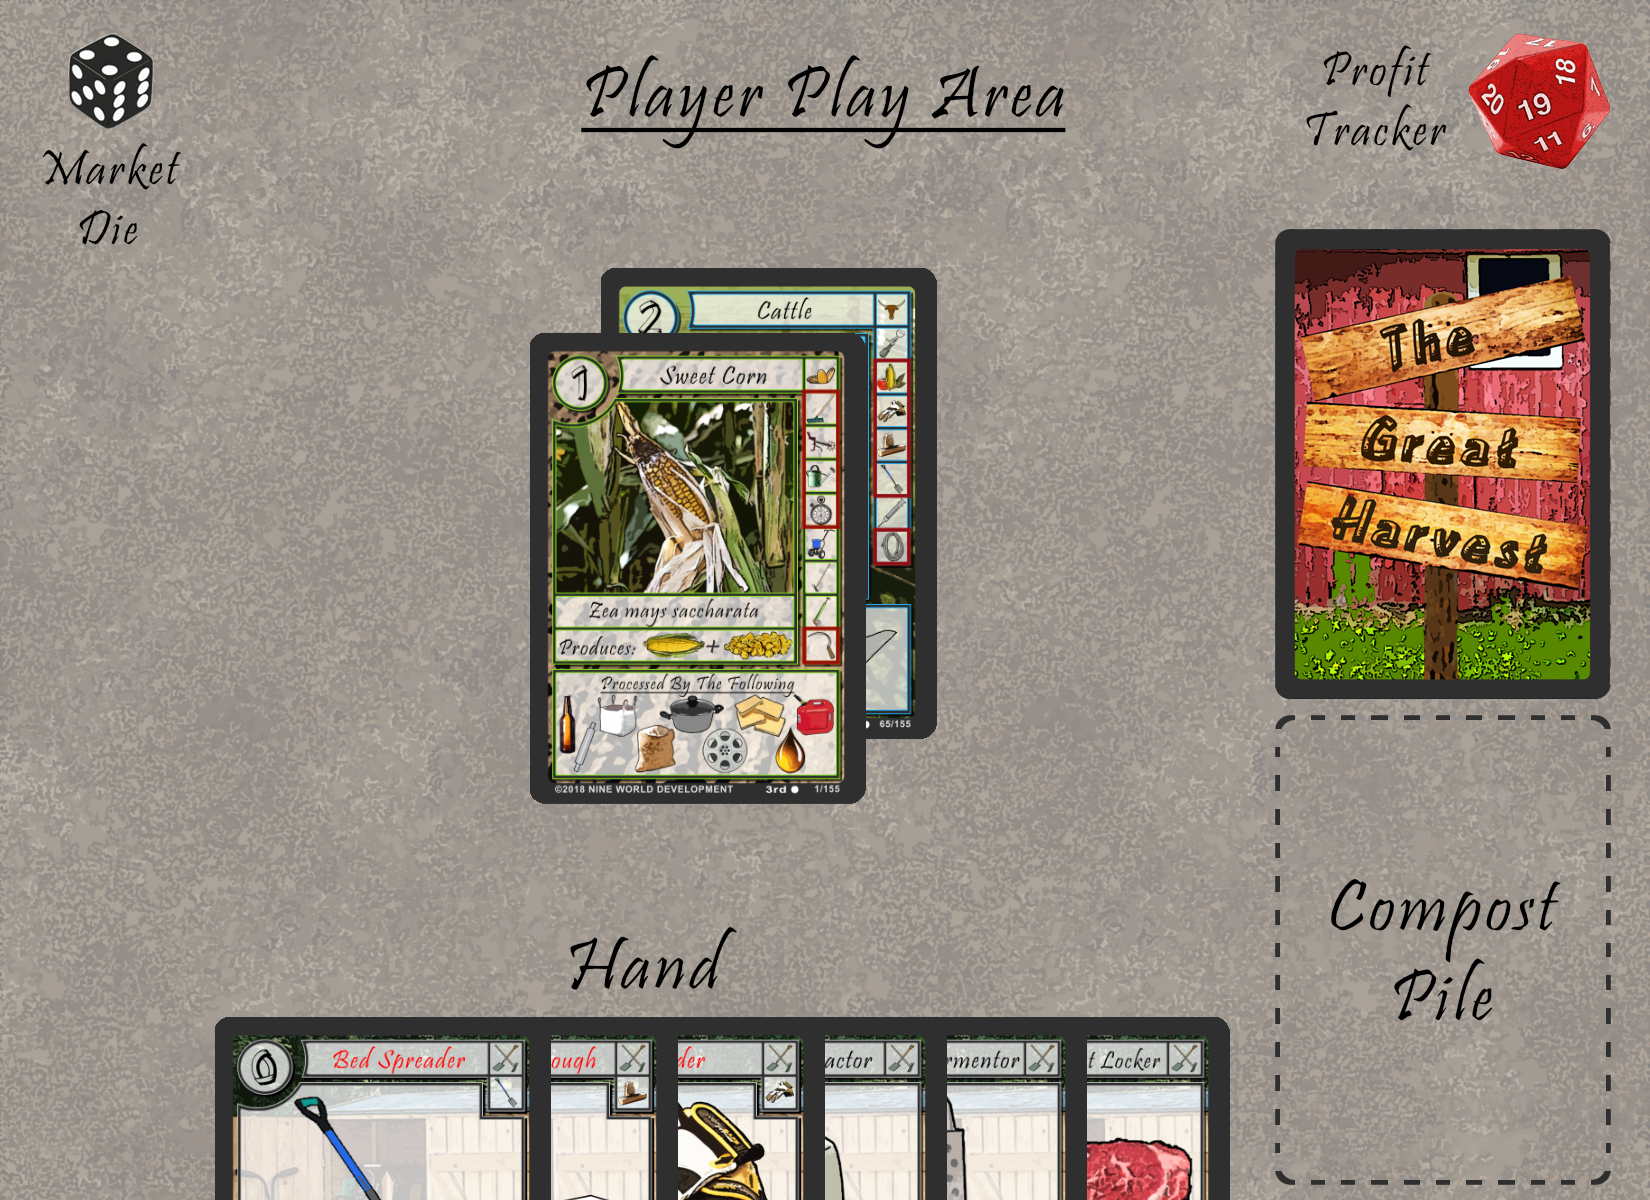
Each turn a player has three Labors to perform. So, for the first turn, our first Labor will be placing the Sweet Corn.

For the second Labor, we will place the Cattle.
The final Labor we will perform is to draw a card from our Farm Supplies. It is the Feeder and we place it in our hand. Our first turn is over.

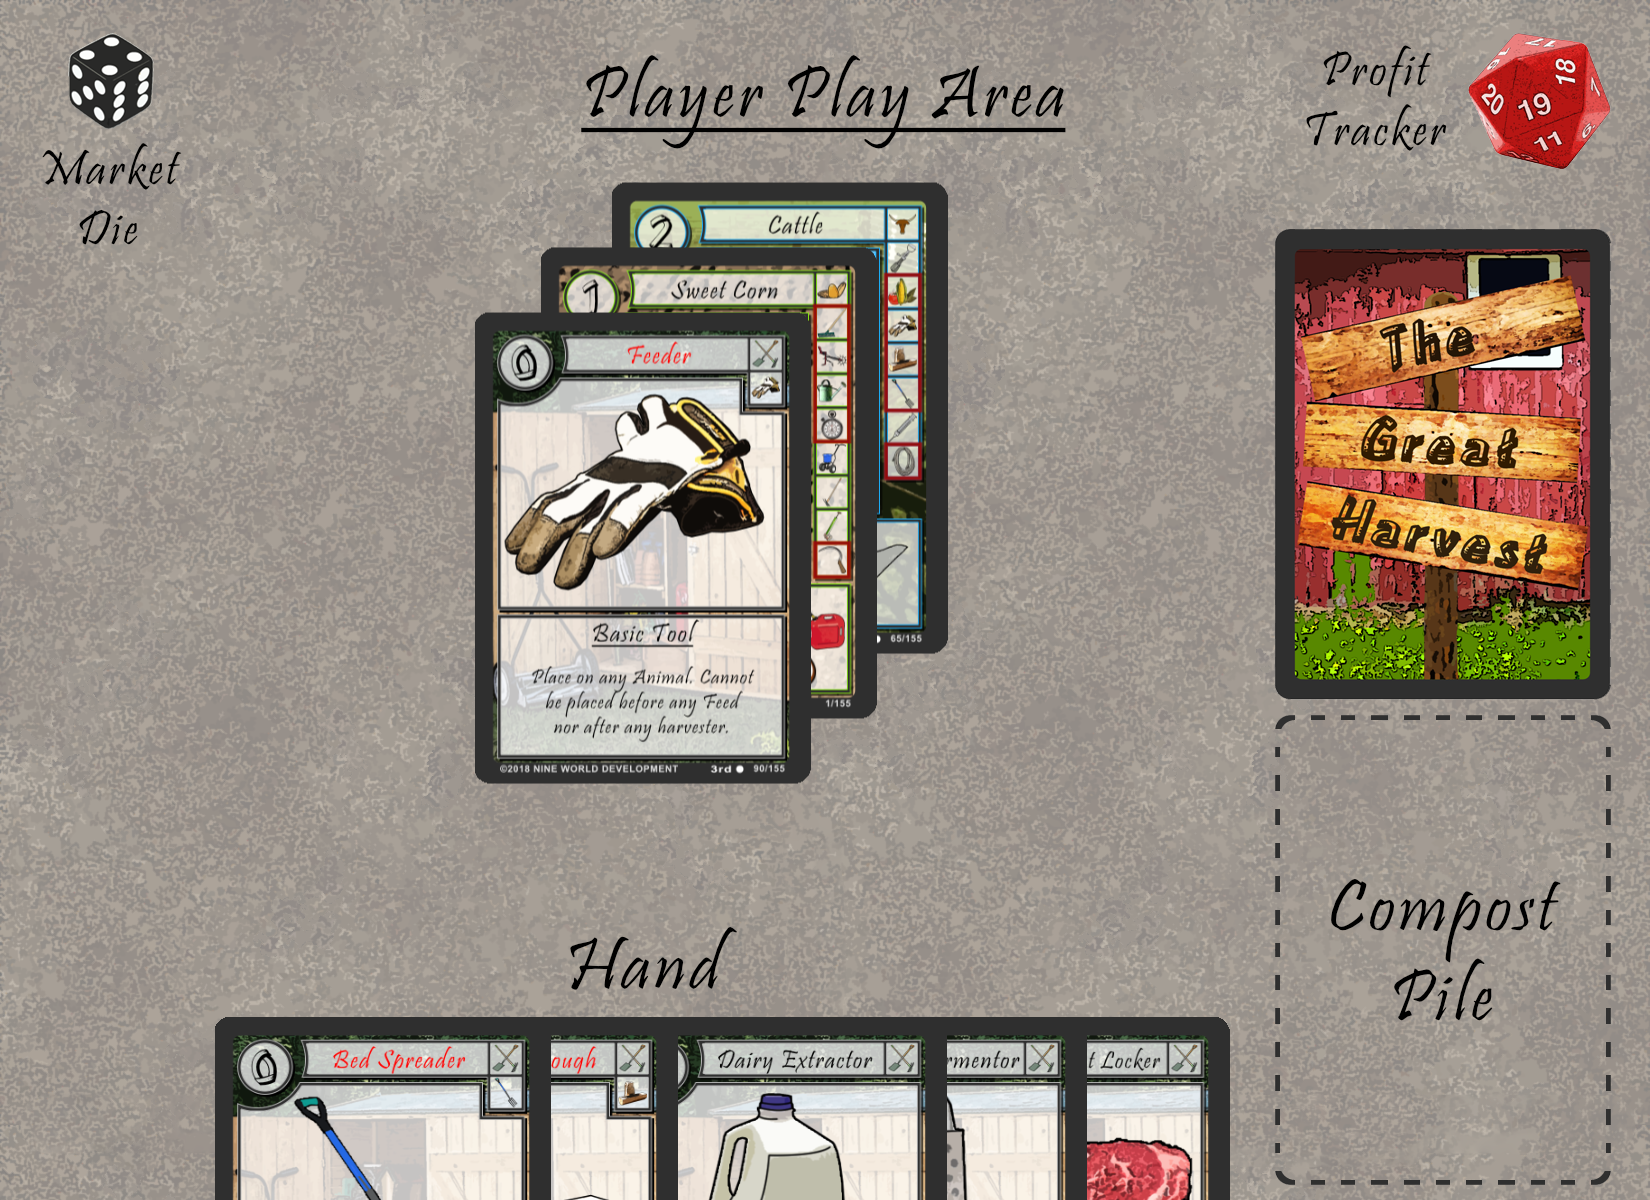
It is our second turn and for our first Labor we place the Cultivator on the Sweet Corn. This begins a new Combo. The next card we would need in the Combo is a Seed Sower. Because we do not have one yet, we will have to draw.

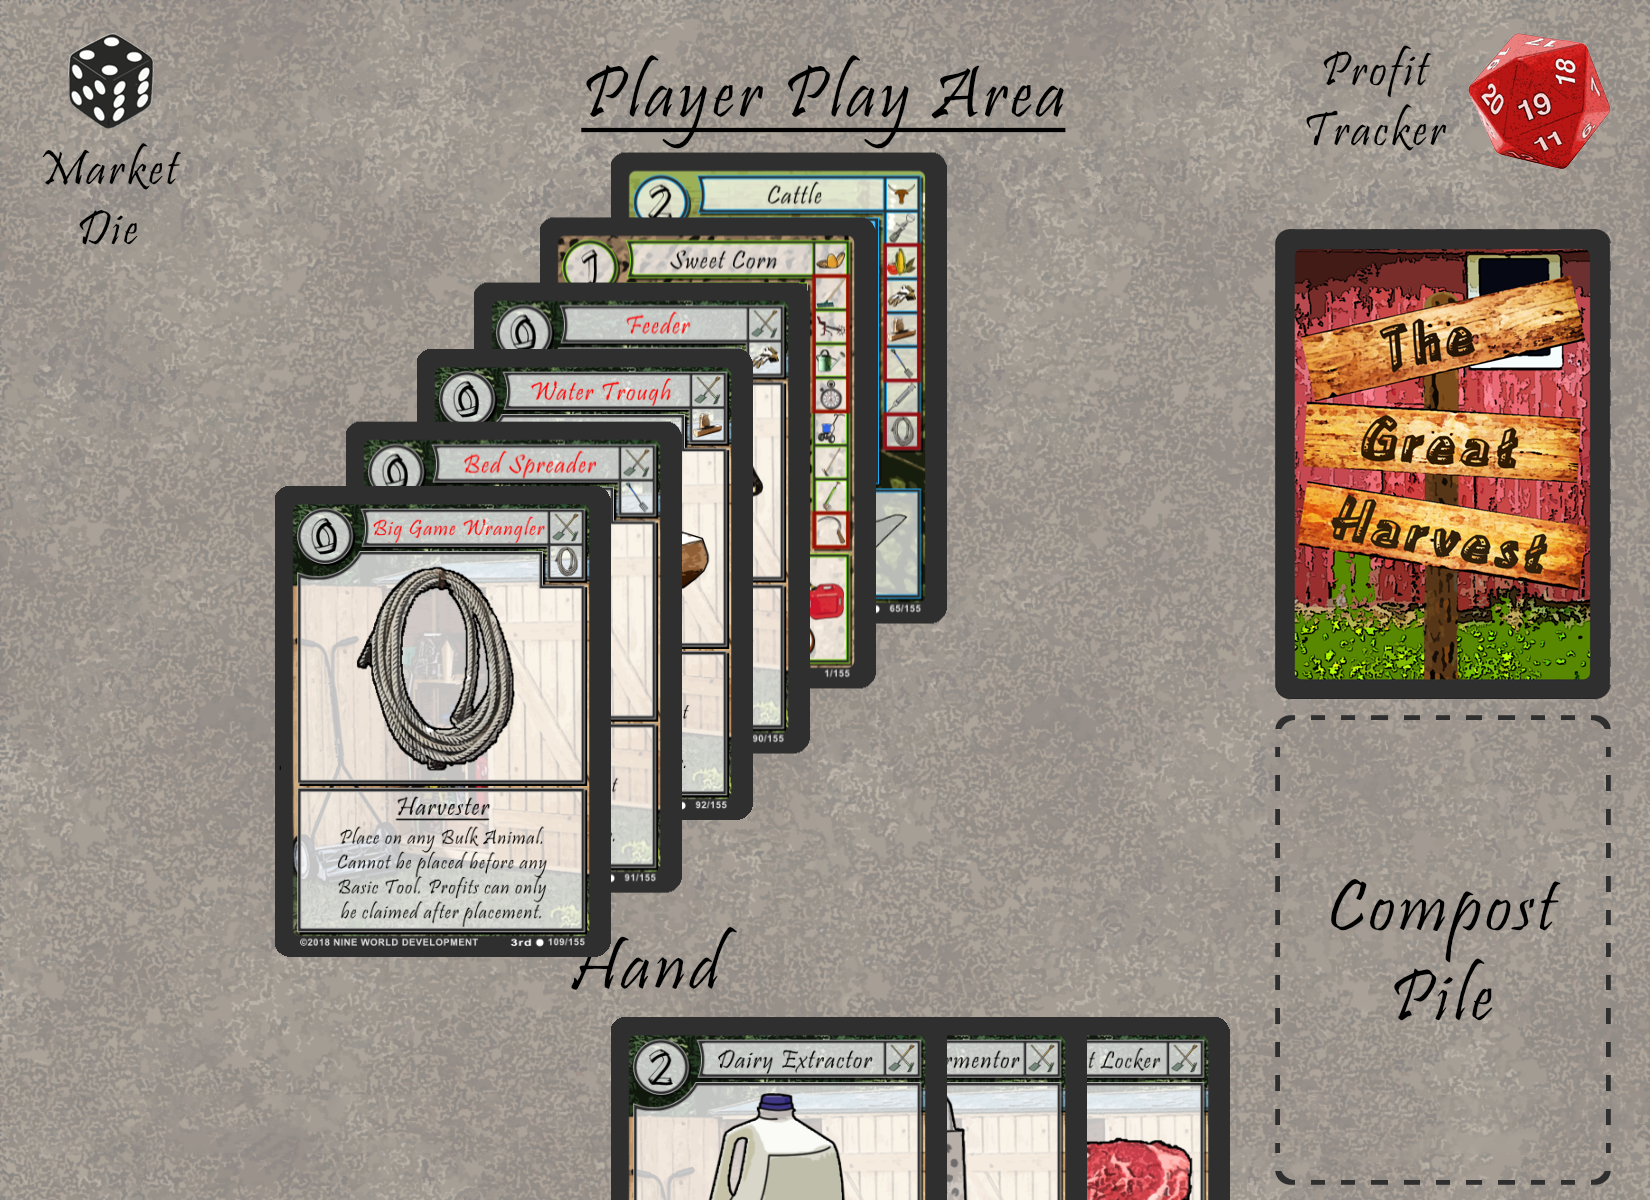
For our second Labor, we draw the Water Trough. We still need a Seed Sower, so we will have to draw again.

For our third and final Labor we draw a Seed Sower! Unfortunately, we have used all our Labors so placing it will have to wait.
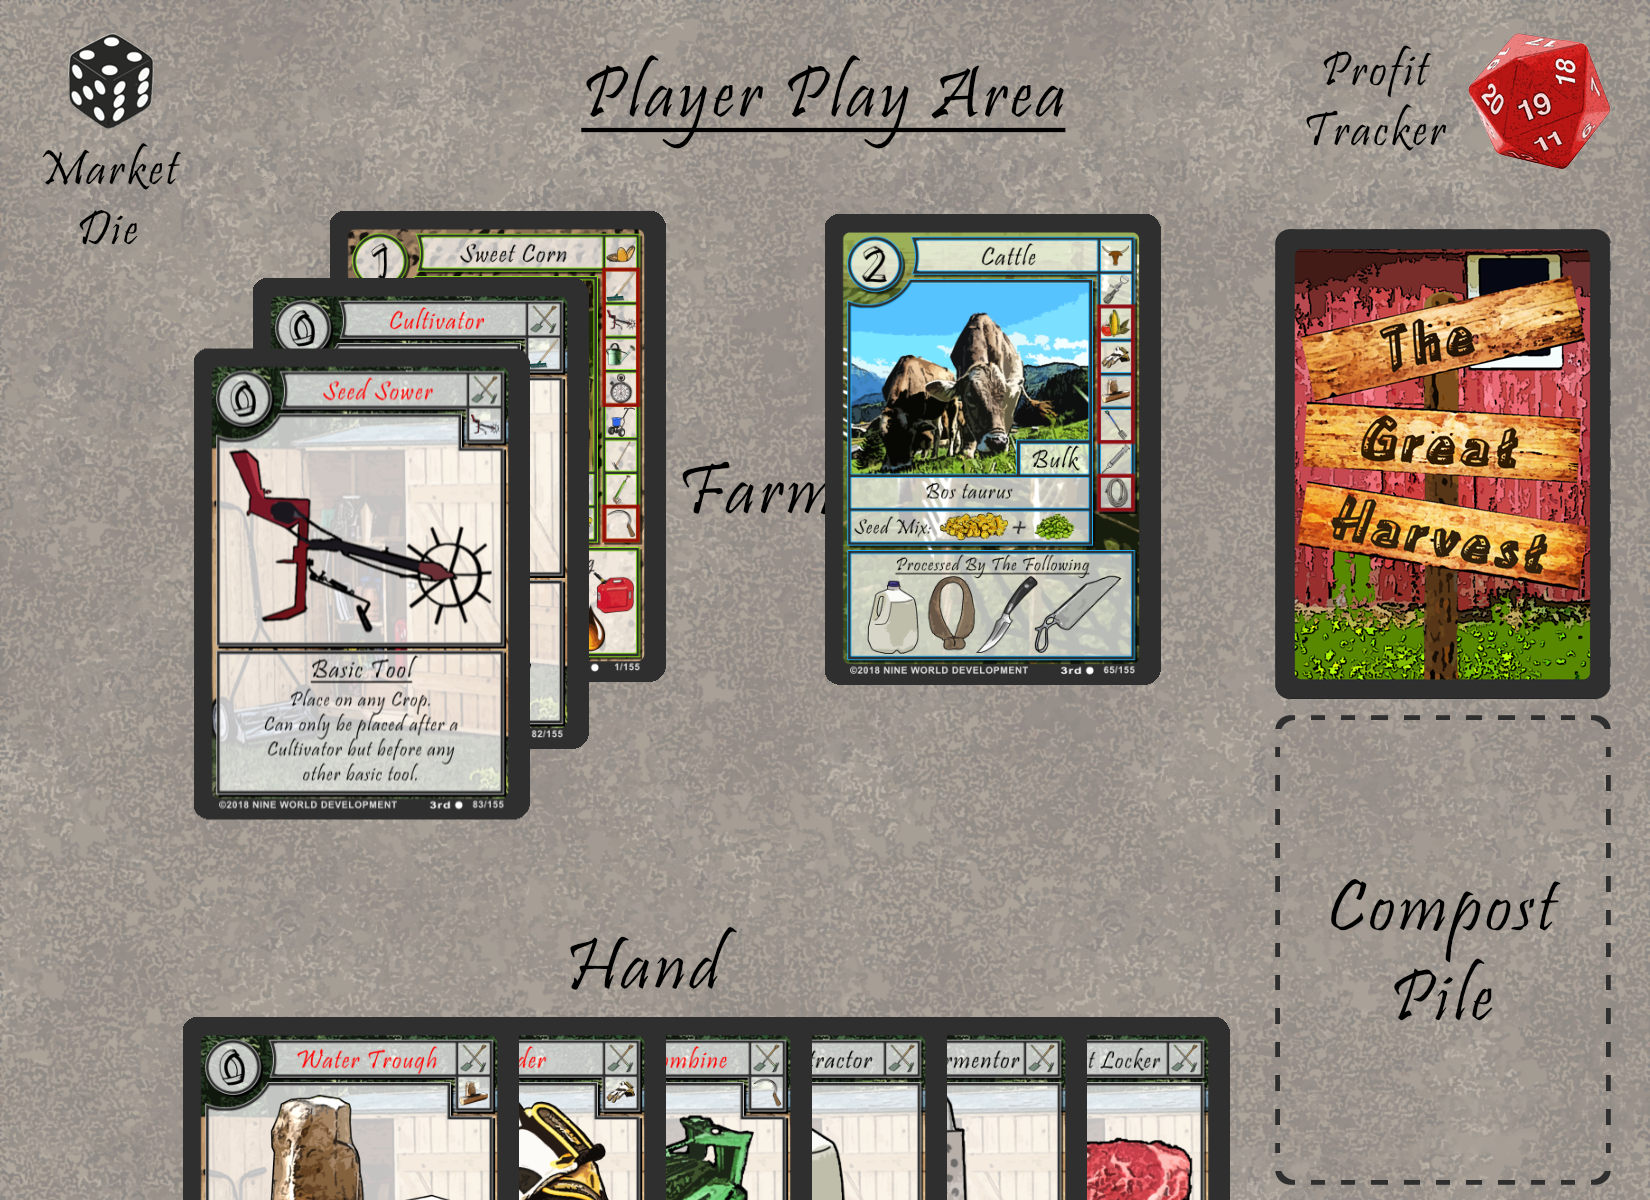
On our third turn, we use our first Labor to place the Seed Sower on the Sweet Corn. The next card we need is an Irrigation, of which we do not have, so we will have to draw.

For our second Labor we draw an Irrigation and place it in our hand.
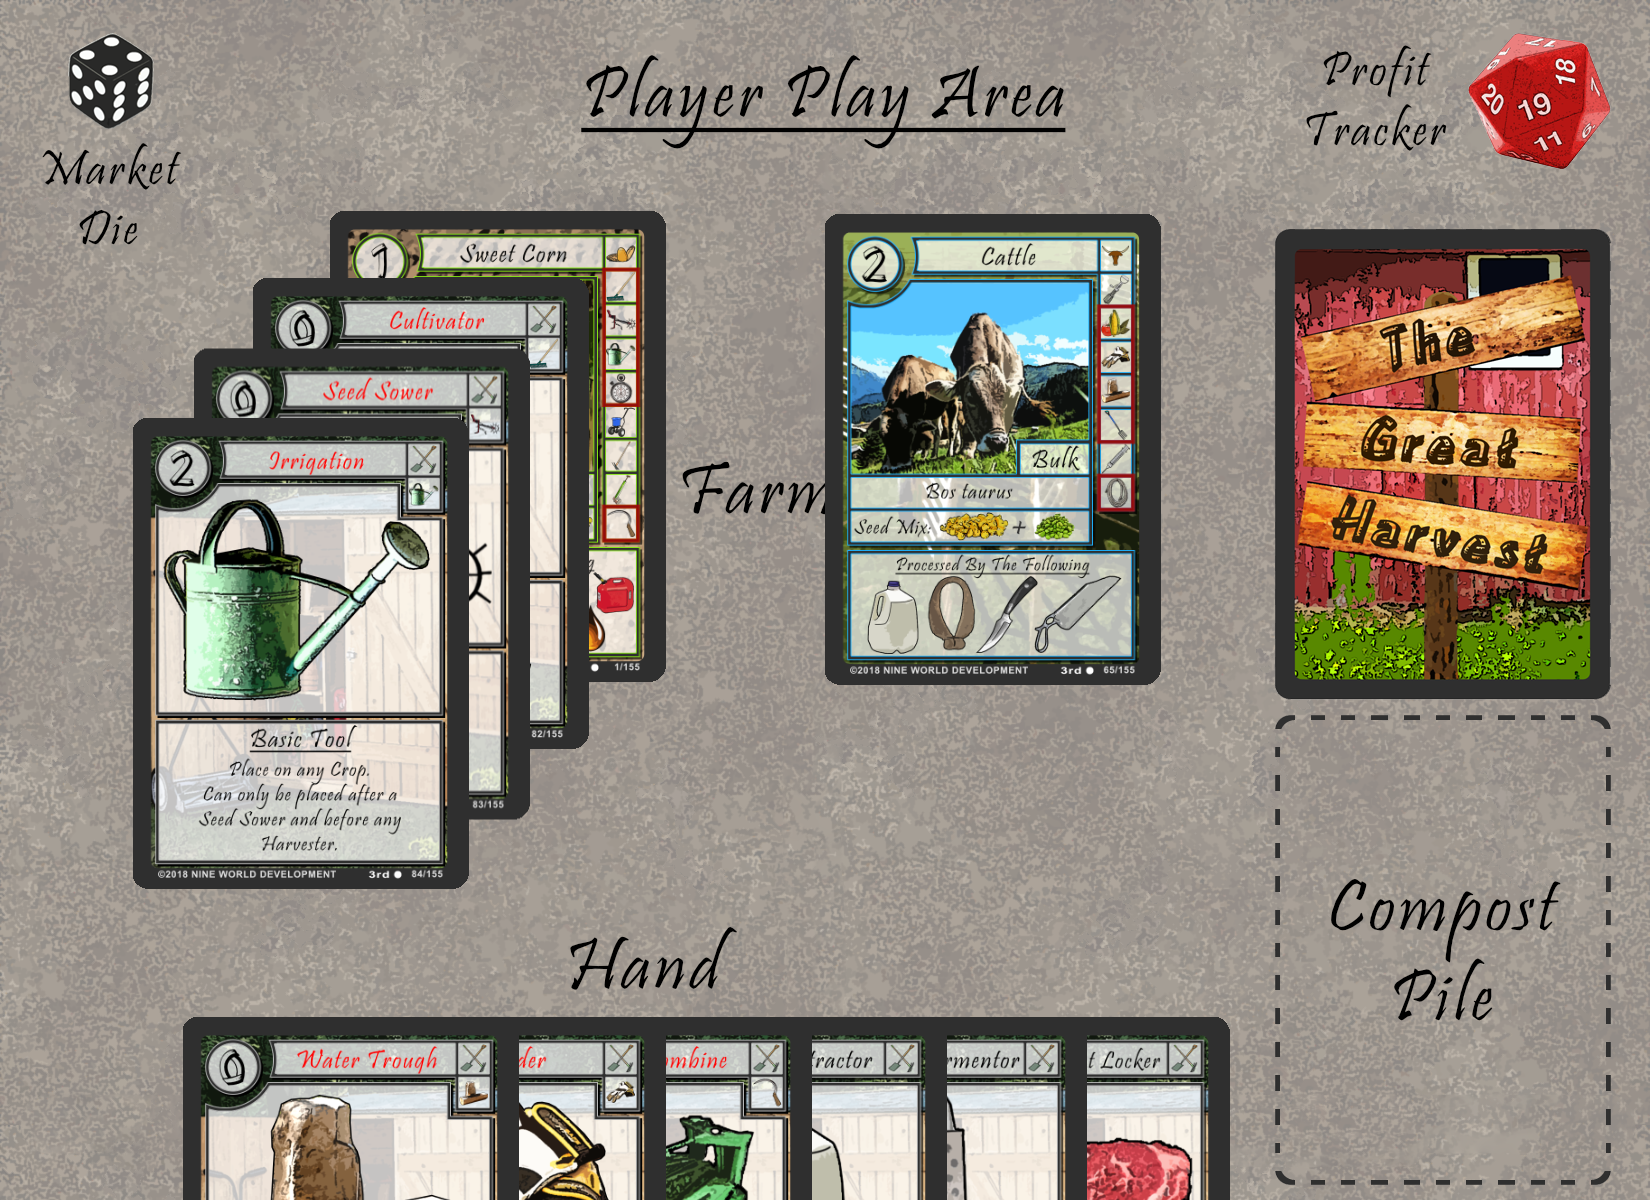
For our final Labor, we place the Irrigation. This ends our turn.

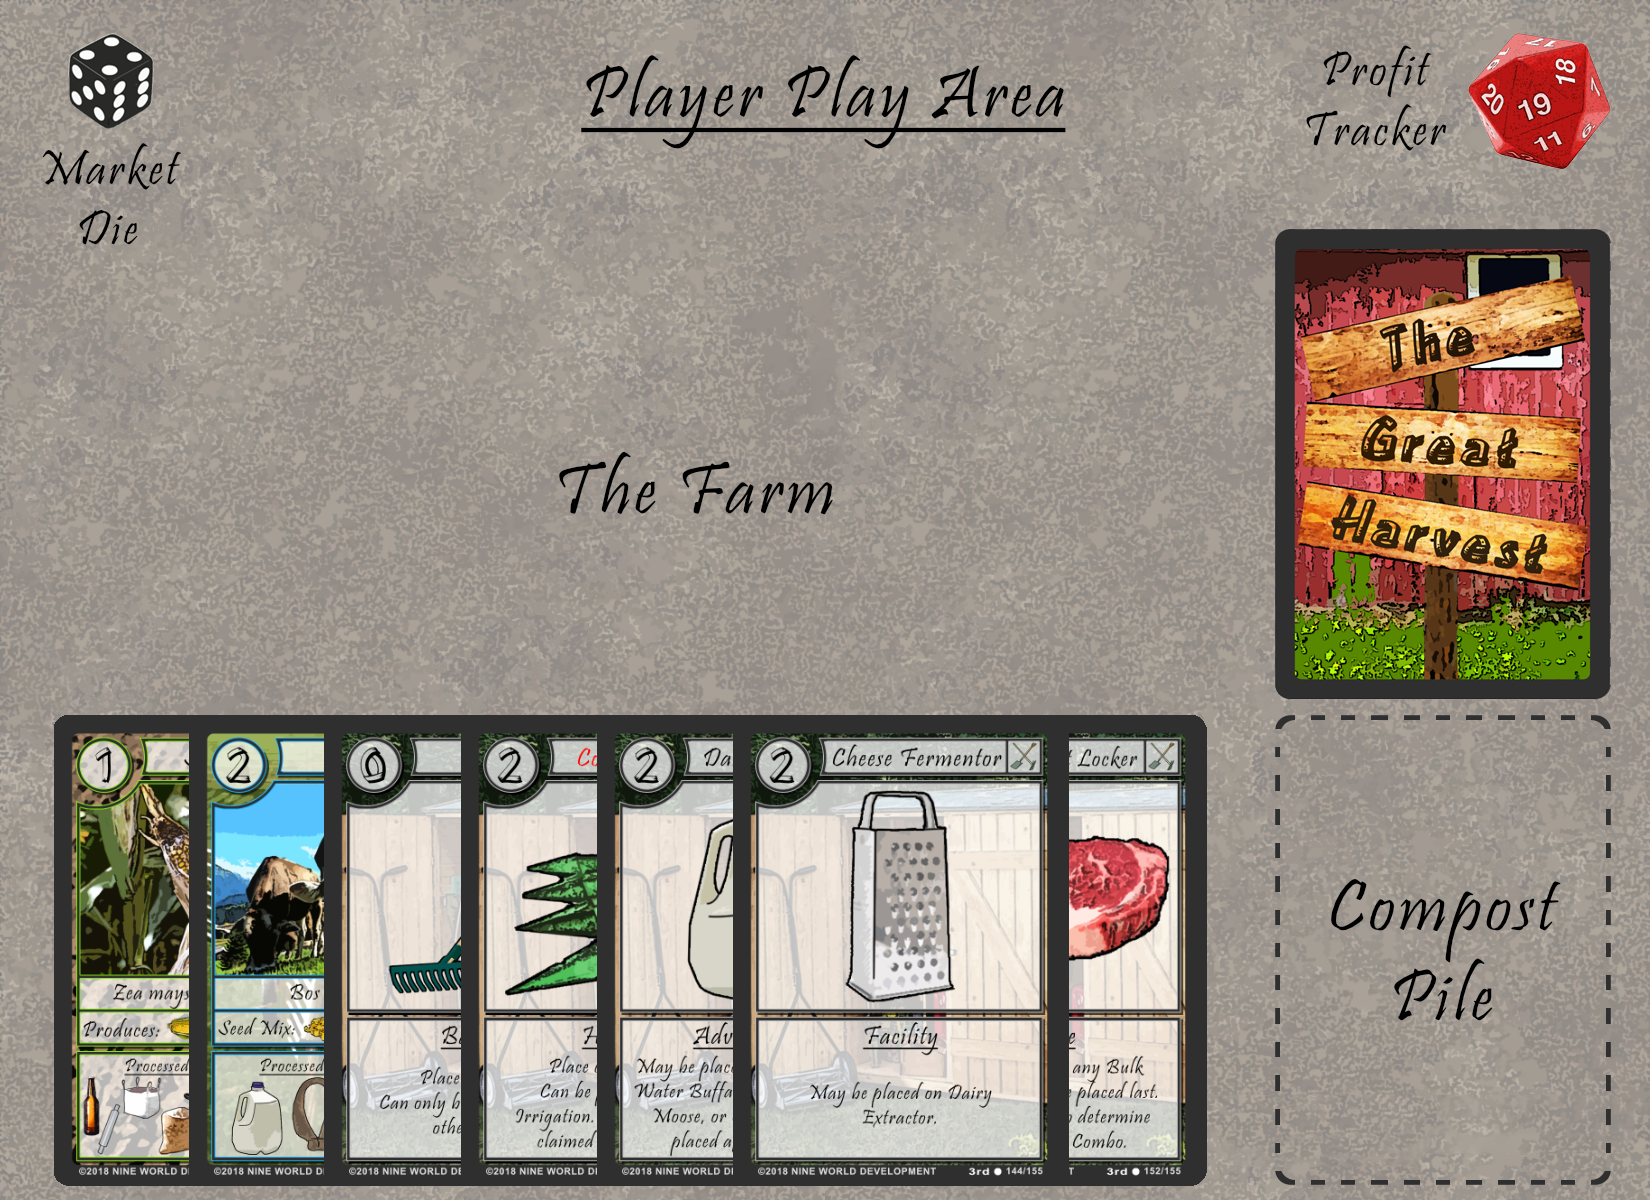
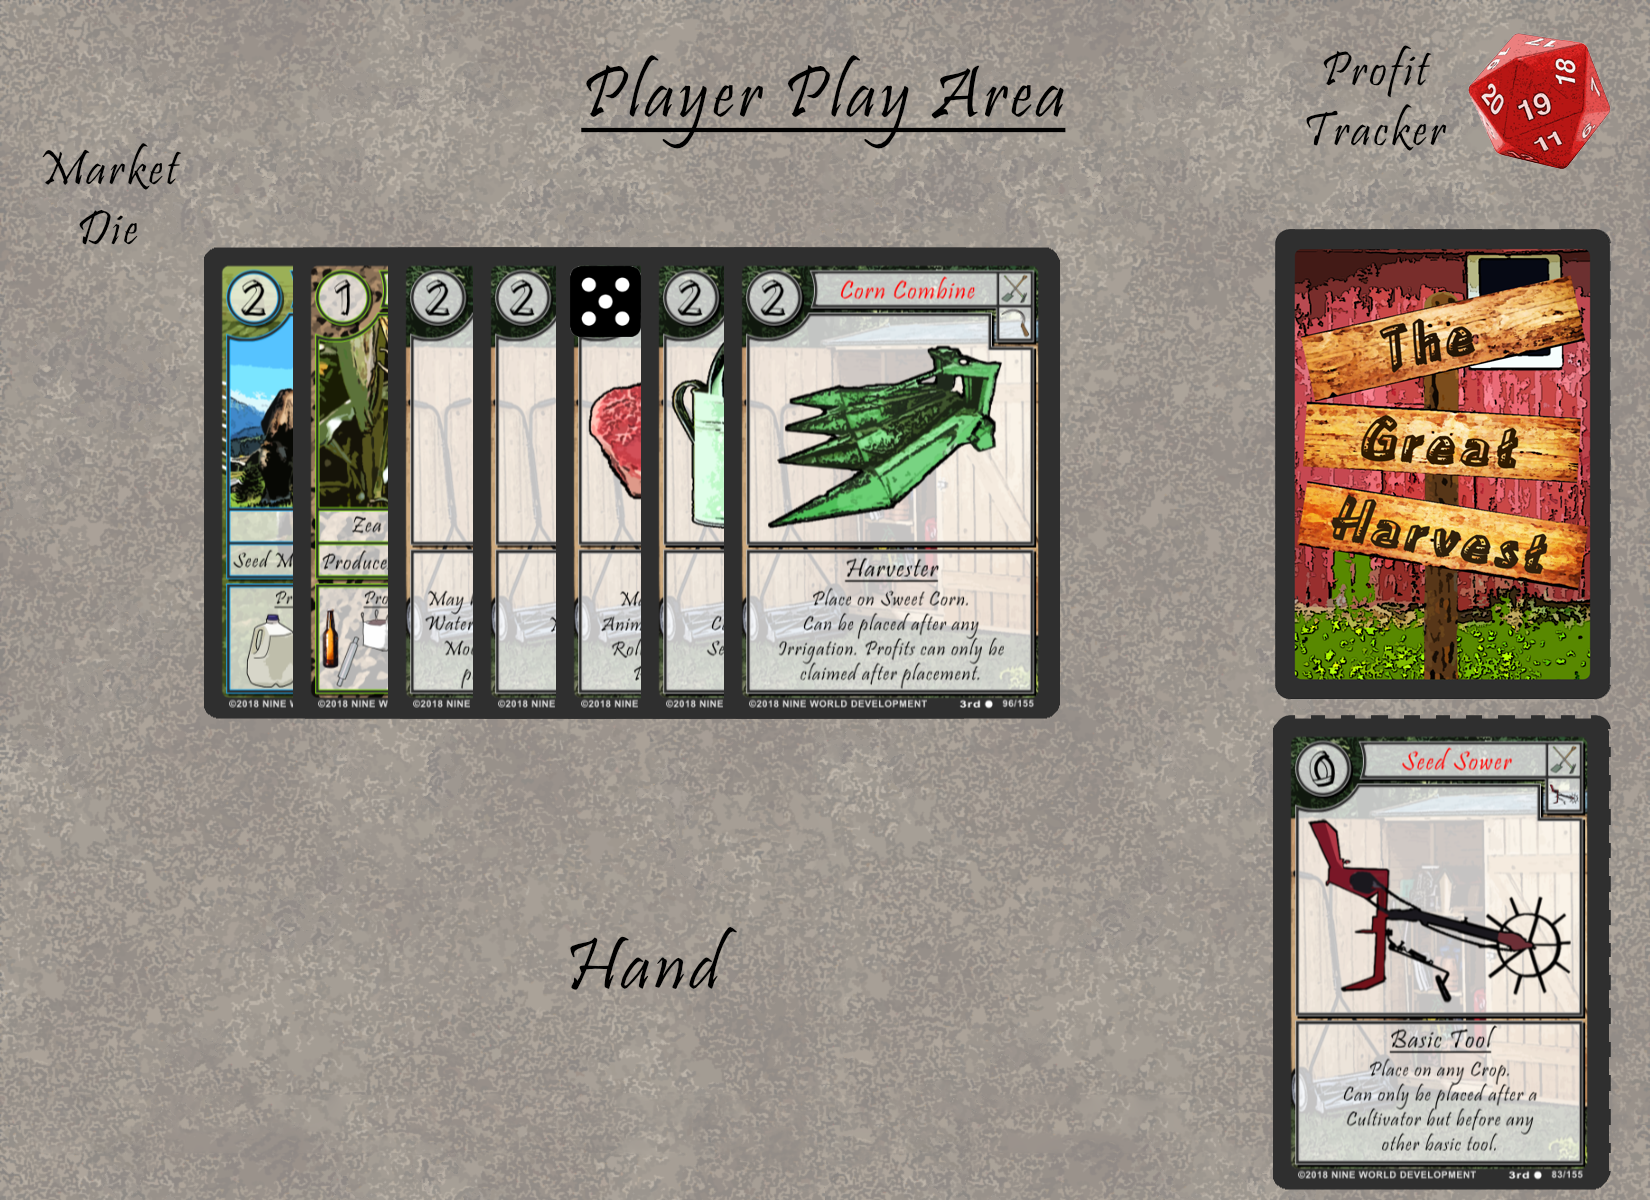
We begin our fourth turn with our first Labor by declaring a Growth Phase for our Sweet Corn. In this case, we place a token to represent this onto the Sweet Corn.

Our second Labor will finish the Sweet Corn Combo by placing the Corn Combine. Now that it has been finished, we could use our last Labor to turn the Combo in for Profits. That Combo would only give us five Profits, so let’s instead use our last Labor for something else.
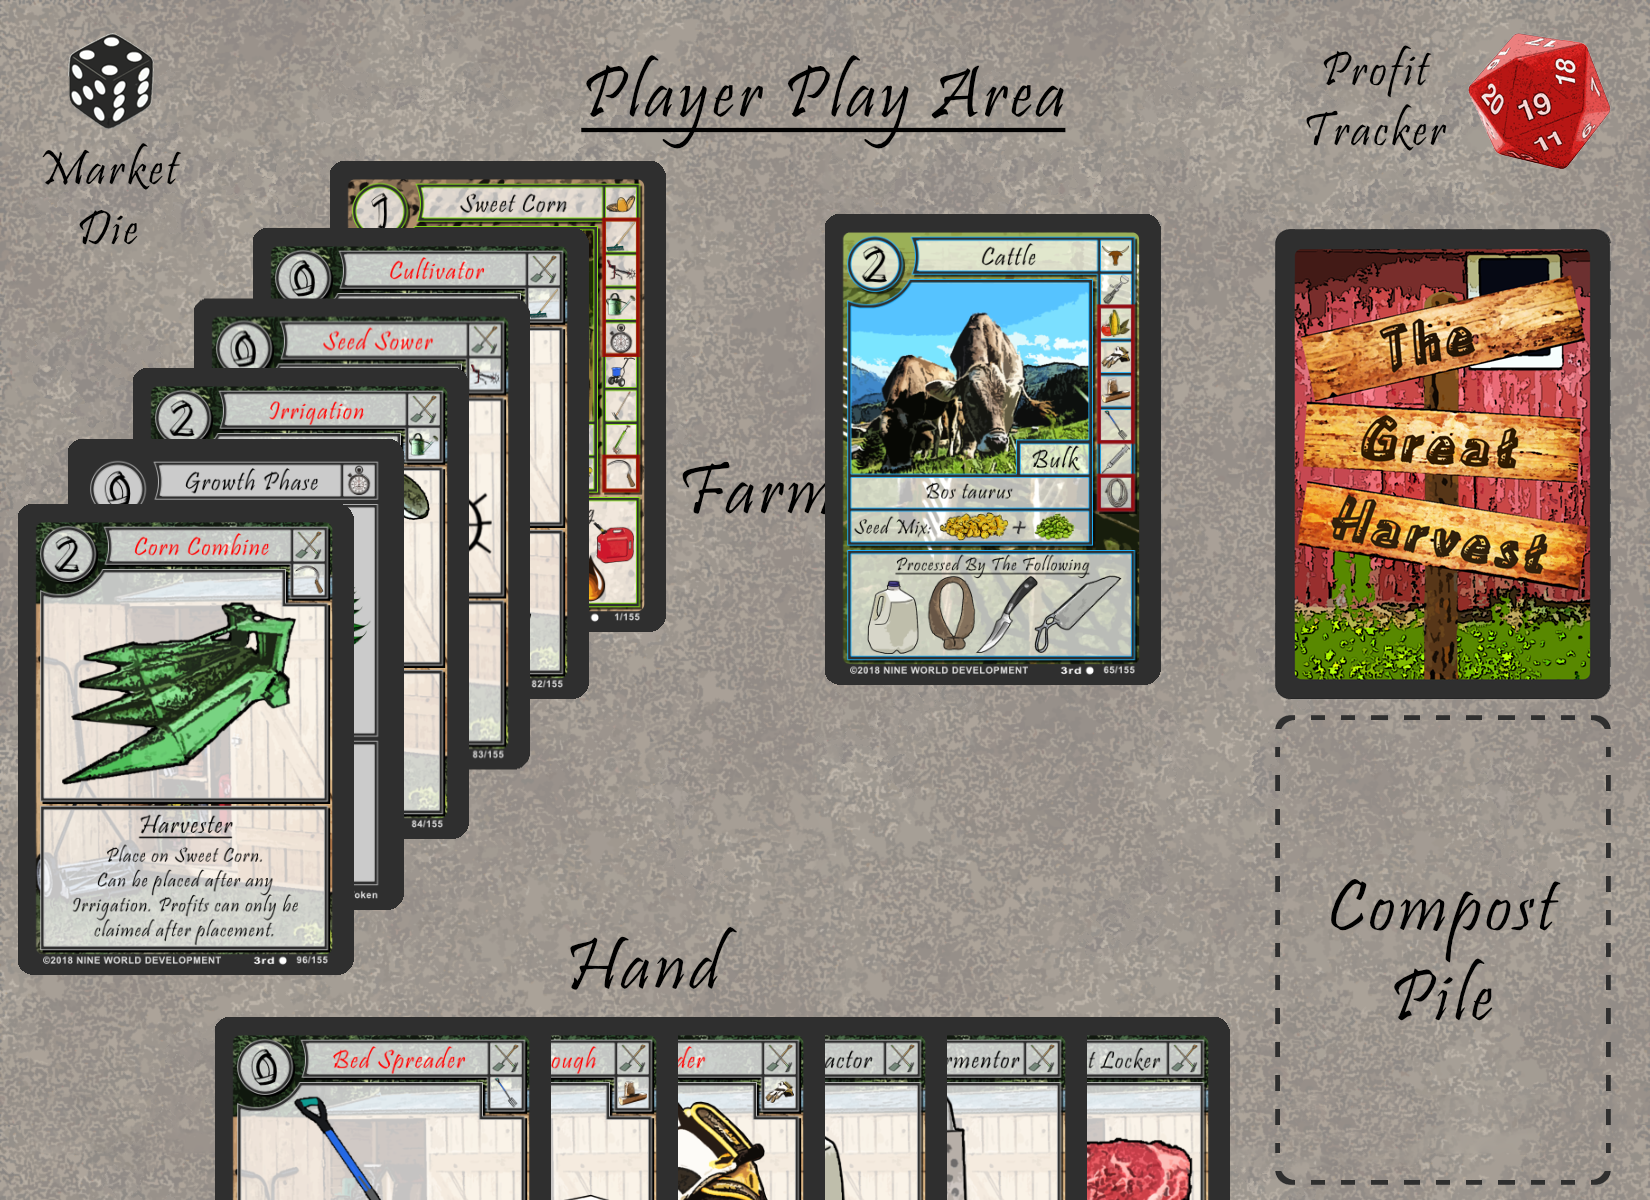
Our turn ends with our final Labor being to draw a card. We place the Bed Spreader in our hand.

Before our next turn begins, let’s take a moment to look at our two main cards on The Farm. You will notice the Sweet Corn produces something, in this case Corn Kernels, that the Cattle need as their Feed. This is how you know which Crops can be Feed for certain Animals.
For our fifth turn, we begin by using one Labor to place the Sweet Corn (With all its Tools underneath) onto the Cattle. The Sweet Corn becomes the Cattle’s Feed, but furthermore because we had previously Harvested the Sweet Corn, its Profits will be added to the Cattle’s. This is what is known as a Nested Combo.
For our second Labor, we place the Feeder.

For our final Labor, we place the Water Trough. Our turn then ends.

Now we begin our sixth turn. Our first Labor is to place the Bed Spreader. After this, our Cattle is ready to be Harvested, but we will need to draw for one.

Our second Labor is to draw a card. This gets us the card we need, the Big Game Wrangler, so we place it in our hand.
Our final Labor places the Big Game Wrangler onto the Cattle and our turn ends.

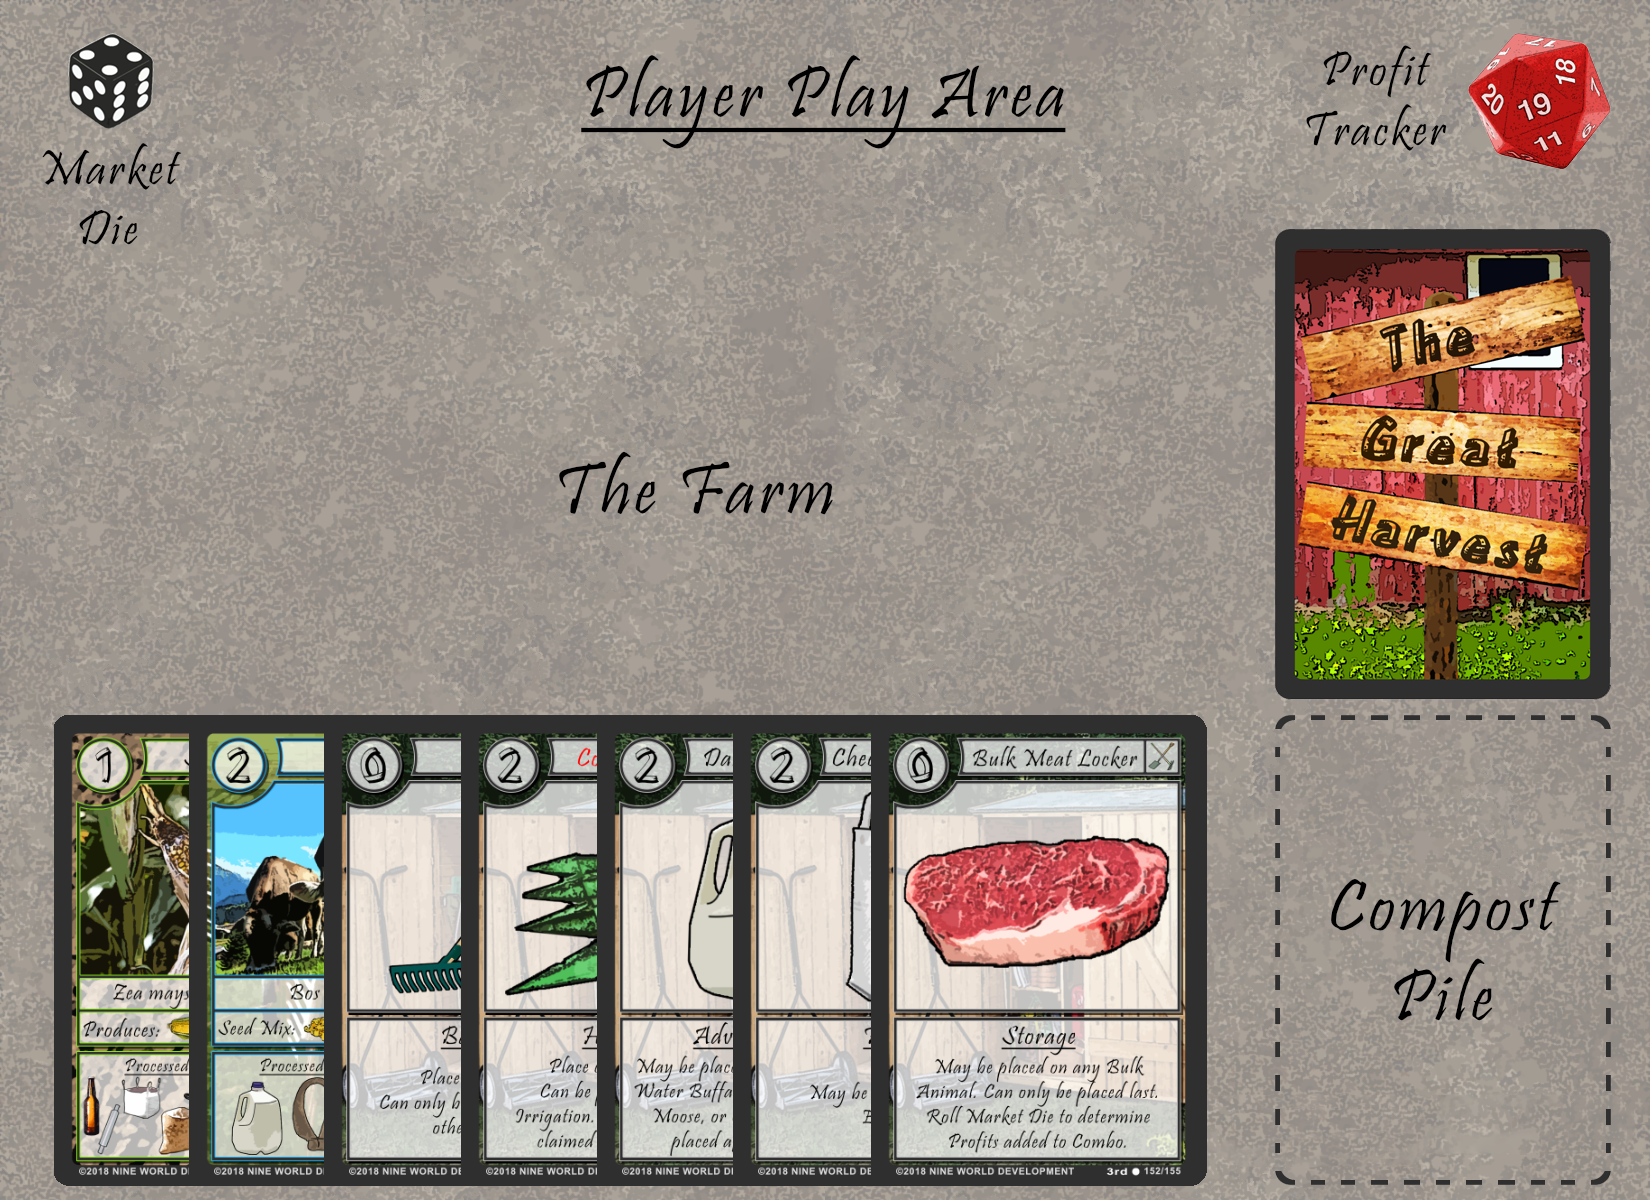
Our Animal Combo is ready to be turned in, but let’s instead add some Profits to the Combo. Our seventh turn begins with our first Labor being to place the Dairy Extractor.
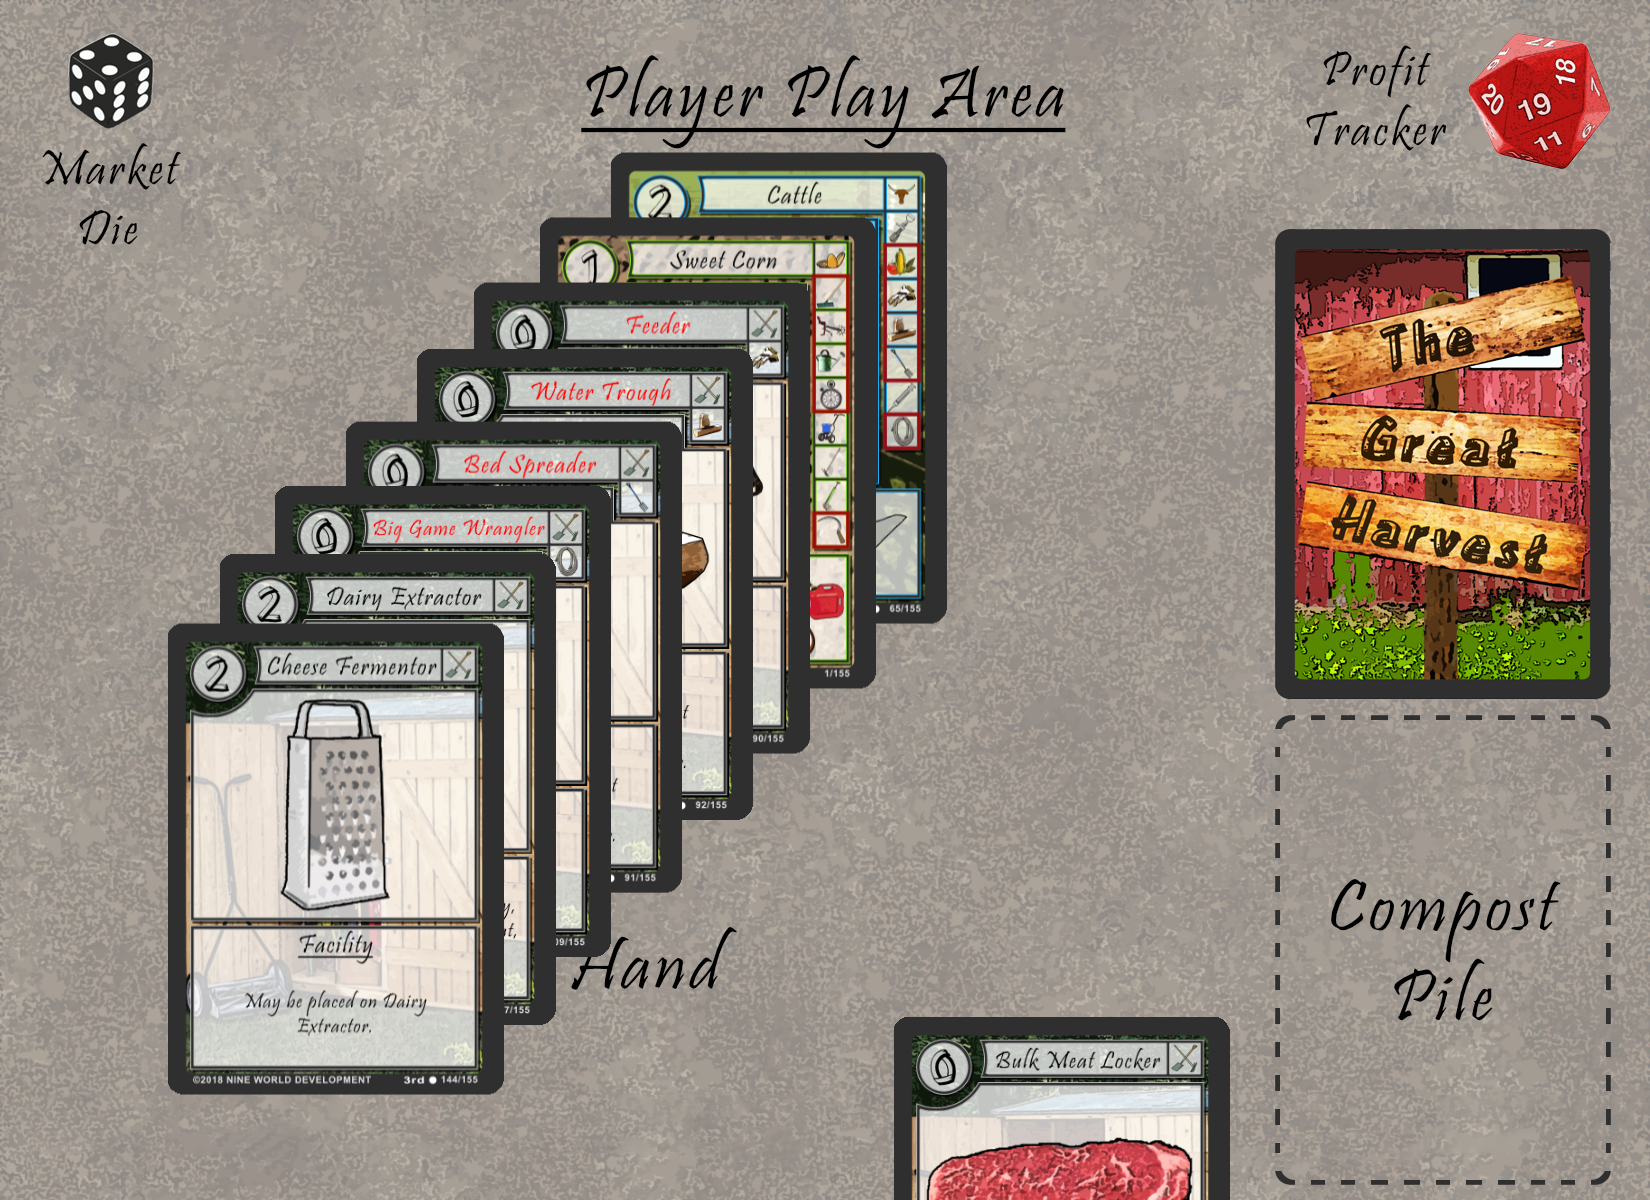
Our second Labor is to place the Cheese Fermentor onto our Combo. We can of course do this because we placed the Dairy Extractor already.
Our final Labor finishes our turn and empties our hand when we place the Bulk Meat Locker. Before our turn ends, we must roll the Market Die to see how many Profits the Bulk Meat Locker adds.
We roll the Market Die and get a five, so when we turn in our Combo, that is five extra Profits. To get our Profits, we will have to wait until our next turn as we used all our Labors.
For our eighth turn, we really only need our first Labor. We use it to turn in our Profits. Possibly the easiest way is to discard the cards worth zero Profits (Except the Bulk Meat Locker since it is worth five Profits,) and then add up the rest. We see here our final Combo is worth 16 Profits! Enough to win a short game!

After the Profits have been counted and added to your total, discard all cards from the Combo and continue play until a player reaches the Top Value. Hopefully this Tutorial helps give new players a good start into how to play. There are many ways to play, including having multiple Crops and Animals in play, working on one particular Combo or spreading your efforts to multiple Combos, or even just drawing cards until you get exactly the card you want (But do not forget that max hand limit.)
Please enjoy playing The Great Harvest and let us know what you think on our various platforms. Thank you for playing!
